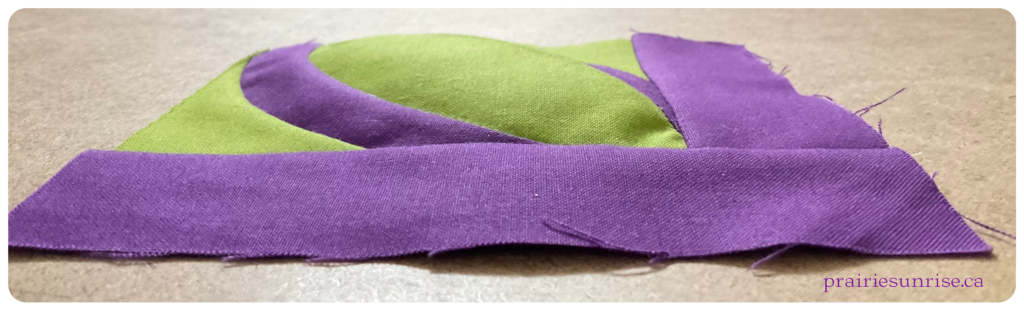
“Oh, that will iron out, just use a dry iron and it will shrink the fabric a bit,” says my personal quilting expert (aka Mom). Ricky Tims says to use “persistent pressing” in his improv curve tutorials. But what happens when pressing fails?
Look closely at the picture , see how the green in the middle buckles? I can not press that out – believe me, I’ve tried! I’m left with a puffy block and a quest to find out why it happened and how to fix it.
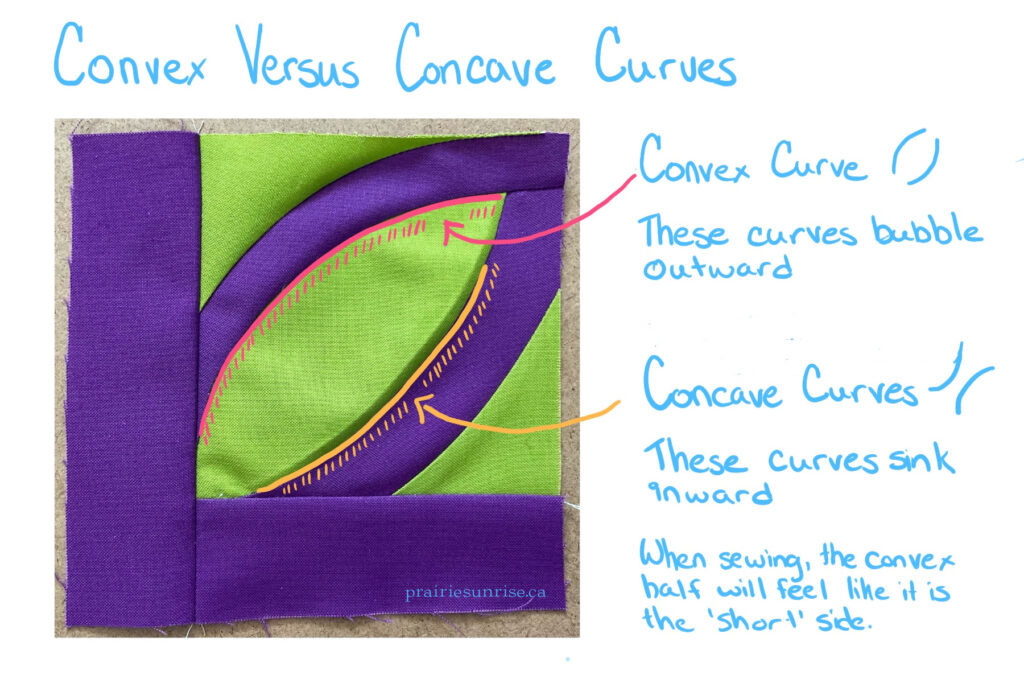
My first clue where I went wrong was a phrase that has stuck from watching Sheila Frampton Cooper’s Improv Curves tutorial. She mentioned that she had always sewn with the concave side down. Let’s dissect this comment a bit, because I do think it helps to explain what happened. I sewed both of the purple arches in the image below with the green (convex) on the bottom and purple (concave) on the top – the exact opposite of what she recommended times two.
What is a Convex and Concave Curve?
These two words are used to describe the shape of the curve. I tend to remember concave as “sinking into a cave” – which means convex has to be the bubble shape. Alternatively, you could remember that flex and convex rhyme and that flexing your bicep forms a convex curve.
Why Should This Matter?
Okay, I am not an expert. However, my guess is that this helps with a few different things.
Stretching: I think sewing with the concave shape on the top helps to avoid the dreaded pucker. Cutting a curve results with fabric cut on the bias, which makes the fabric a bit stretchy. I know I definitely pulled the purple concave curves a bit as I sewed (manipulating it around the curve). If the purple gets pulled longer than it should be while the green maintains its shape – puckers will ensue.
The convex shape seems less prone to stretching with manipulation. If the concave shape is on the bottom, it just glides along the table without any stretching. I’m guessing you could get the same result with the concave shape on the top and just being super careful.
Tiny tucks: The concave side will seem longer while sewing. I found that it was easier to end up with the tiny tucks as the fabric turned. With the concave side on the bottom it seemed to just lay a lot smoother on the finished product.
Personal Preference: Maybe just one way is easier than another for different individuals?
Experiment and Results
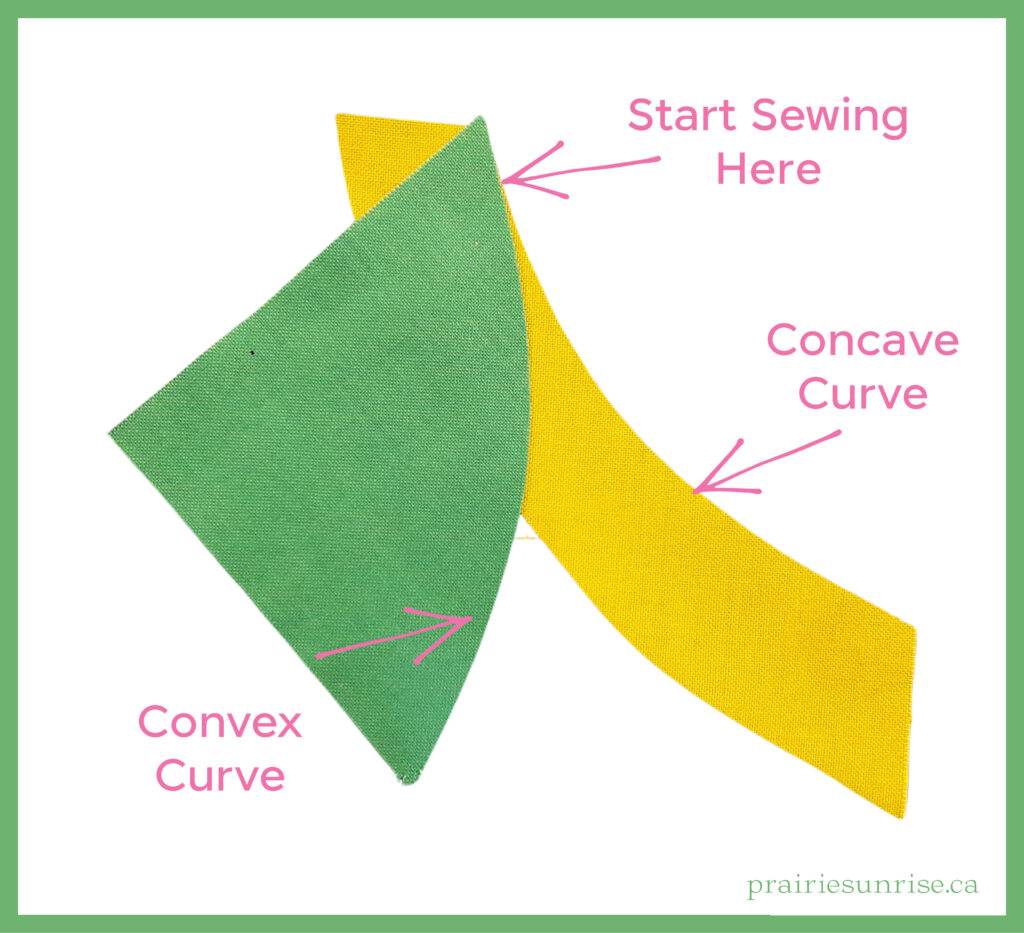
Previously, I never thought about which way my fabric was going through the machine. I had to make a conscious effort to make sure the convex side was up.
At first it took flipping and turning to sew with the concave side up. However, it soon just felt normal. Sometimes I flipped the top piece up so it was more vertical. This seemed to help the curves fit together a bit better.
I can’t say it was fast! I usually took 2-4 stitches and lifted my presser foot to re-position the fabric.
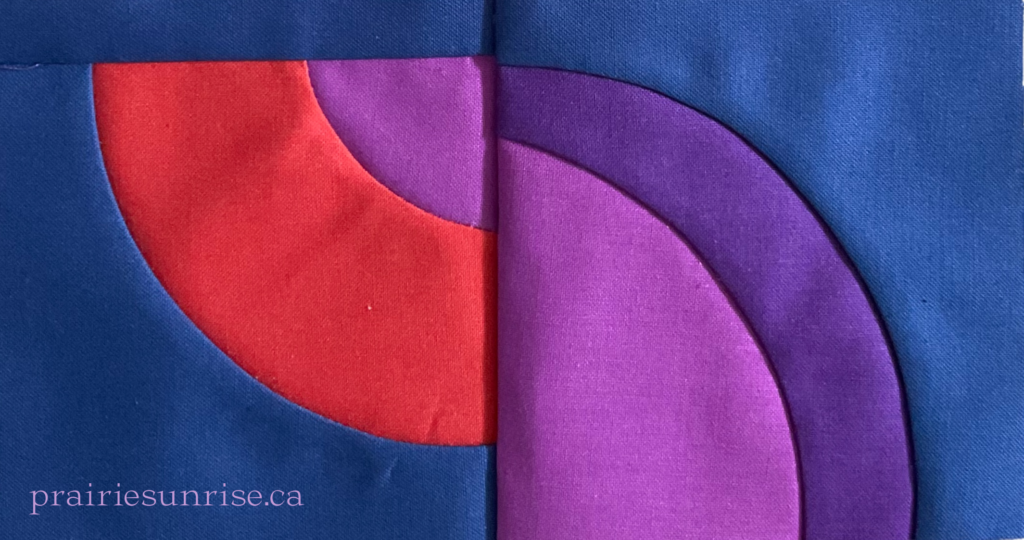
Results: I liked sewing with the convex site up. I ended up with some super smooth blocks – no stretching or little tucks. Verdict = Convex side up for the win!
The Results!
References
How to Piece Curves with Sheila Frampton Cooper – The Quilt Show, Episode 1306